
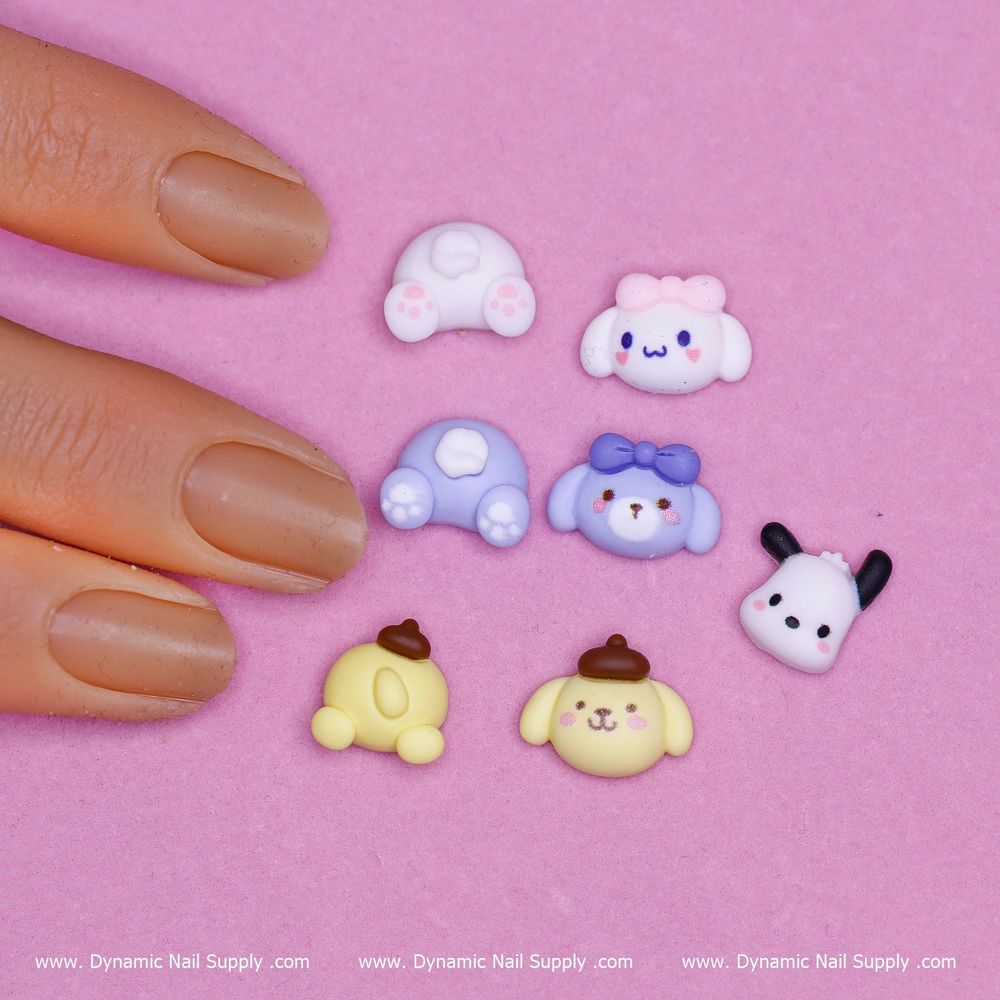
Small accents can make a manicure unforgettable. Cute cartoon nail charms are an easy way to add personality—teddy bears, kitties and gummy-style figures—whether you’re doing a quick at-home update or styling clients in the salon.
In this guide you’ll find step-by-step techniques and pro tips to position, secure and seal a 28-piece charm set so the motifs stay bright and intact. To view product options before you start, view cartoon nail charms pack for color and style options.
What’s in the pack and who it’s for
This set includes 28 pcs of mixed cartoon character charms sized for nail art. The assortment features bear and kitty motifs plus several playful designs like gummy bear and Hello Kitty-style charms. Priced at $8.00, the set is a budget-friendly choice for students, hobbyists and busy nail techs who want to add whimsical accents without a big investment. Dynamic Nail Supply carries the kit if you prefer to buy from a single source.
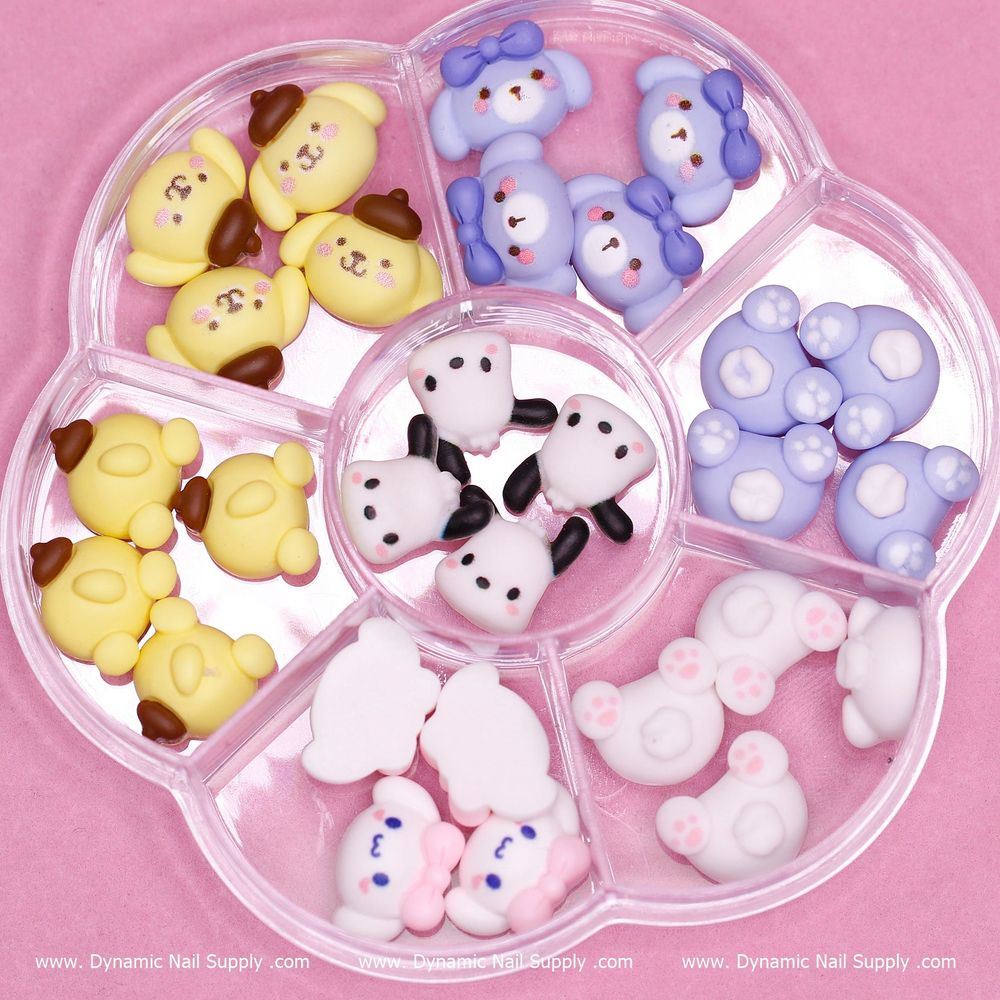
Tools and prep for professional-looking placement
Gather these basics before you begin: clean nails, base coat or builder gel, nail glue or gel adhesive, a small brush or dotting tool, angled tweezers, a clear topcoat or soak-off gel topcoat, and a lamp if using gel. Proper prep is what separates a casual look from a salon finish.
- Clean and dehydrate: remove oils and polish, push back cuticles and lightly buff the nail plate so adhesives bond reliably.
- Plan your layout: place charms over a single accent nail or create a repeating motif across fingers. Lay them out on a palette first to visualize the final composition.
Step-by-step: apply cartoon charms like a pro
- Apply base: build a smooth foundation using your preferred base coat or thin layer of builder gel. Cure if using gel.
- Create a tack point: on each nail where a charm will sit, apply a small drop of nail glue or a dab of uncured gel. If using gel, don’t fully cure the tack layer until the charm is positioned.
- Place the charm: pick a piece up with tweezers or a wax pick and set it gently into the adhesive. Press lightly for a few seconds to seat it; for gel, cure with a lamp to lock it in place.
- Seal the edges: brush a thin layer of clear topcoat around the base of the charm—avoid pooling on top of detailed textures to preserve definition. For extra hold, encapsulate the charm with a thin rim of builder gel and cure.
- Finish: once sealed and cured, apply a final topcoat to surrounding nail surfaces to blend the charm into the manicure and increase longevity.
Placement and design tips to elevate the look
Size and position change the vibe. Center a single larger bear on an accent nail for a bold statement, or scatter small kitty faces across short nails for a subtle playful touch. Contrast a muted neutral polish with an iridescent teddy charm to make it pop, or match bright glitters with gummy-style figures for festival-ready nails.
- Balance size: pick one or two nails for larger charms; overload can feel cluttered and catch on fabrics.
- Contrast textures: pair matte polish with glossy charms or vice versa to highlight charm details.
- Symmetry vs. variety: repeat the same charm on both hands for a salon symmetry, or mix different characters for an eclectic set.
Care, removal and safety notes
These tiny pieces are decorative and fun, but they are small—keep them away from young children and pets. When working with adhesives and solvents, ensure good ventilation and follow manufacturer instructions for those products.
- To extend wear: avoid rough activity for the first few hours after application and reapply a thin topcoat every 5–7 days to refresh the seal.
- Removal: many charms will come off when adhesive is softened with acetone or when encapsulating gel is filed and soaked; remove gently to avoid damaging the natural nail.
- Storage: keep unused charms in a closed container to prevent loss and to keep them free from dust and moisture.
Common problems and quick fixes
If a charm lifts slightly, press it back into place and add a tiny amount of adhesive under the edge, then cure or let fully set. For snagging, file a very small bevel at the charm’s edge or reduce the height with careful filing before resealing. If a charm breaks, consider combining smaller pieces to create a mosaic accent rather than discarding the set.
Final thoughts
With a 28-piece assortment that includes bear and kitty motifs plus playful novelty pieces, cute cartoon nail charms are a simple way to bring professional-looking personality to manicures. Adopt the prep and sealing steps above and you’ll get strong adhesion and salon-grade polish presentation every time.
